
Best E-Commerce Tools to Buy in July 2026
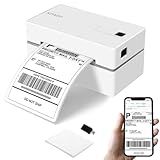
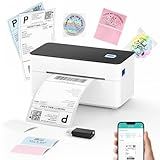
KNAON Bluetooth Thermal Shipping Label Printer, 4x6 Portable Thermal Address Label Printer for Small Business, Compatible with iPhone,Android,Windows,Mac,Chromebook –Works with Ebay Shopify USPS&More
-
WIRELESS CONVENIENCE: EASILY PRINT FROM IOS, ANDROID, AND WINDOWS DEVICES.
-
VERSATILE TEMPLATES: ACCESS 3,000+ TEMPLATES AND 5,000+ ICONS FOR DESIGNS.
-
COMPACT & FAST: PORTABLE DESIGN WITH A SPEED OF UP TO 180 MM/S.


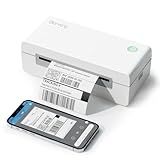
Gloryang Bluetooth Thermal Shipping Label Printer, 4X6 Inkless Label Machine for iOS, Android, Laptop, Wireless Printer for Small Business, Compatible with Amazon, UPS, Shopify, White
- COMPACT DESIGN SAVES DESK SPACE-IDEAL FOR HOME AND SMALL BUSINESSES.
- WIRELESS CONNECTIVITY FOR SEAMLESS PRINTING ACROSS ALL DEVICES.
- FAST, CLEAR THERMAL PRINTING WITHOUT THE HASSLE OF INK OR TONER.
![Position Your Brand: Shopify Made Easy [2022] (Ecommerce Online Store Tool Kit)](https://cdn.blogweb.me/1/41tn_SP_8_Md2_L_SL_160_17ba3d81c3.jpg)
Position Your Brand: Shopify Made Easy [2022] (Ecommerce Online Store Tool Kit)
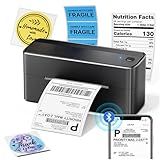
Phomemo Bluetooth Shipping Label Printer, 241BT 4X6 Wireless Thermal Label Printer for Small Business, Labels Printers for Shipping Package, Compatible with iPhone, Android, Amazon, Shopify, Black
-
WIRELESS PRINTING SIMPLIFIED: PRINT FROM ANY IOS/ANDROID DEVICE EASILY!
-
FAST & COST-EFFECTIVE: SAVE MONEY WITH INKLESS THERMAL PRINTING TECHNOLOGY!
-
MULTI-PLATFORM SUPPORT: IDEAL FOR MAJOR MARKETPLACES LIKE AMAZON, EBAY, AND ETSY!
Shopify: The Definitive Guide to Setting Up Your Store (Step-by-step Guide for Beginners to Build Your Online Business)
SVANTTO Bluetooth Thermal Shipping Label Printer 4x6, Compatible with Windows/Mac/Android/iOS, High-Speed 4x6 Label Printer for USPS, UPS, Ebay, Etsy, Shopify, Poshmark, Inkless Printing
- INK-FREE PRINTING: SAVE MONEY AND HASSLE WITH ADVANCED THERMAL TECHNOLOGY.
- SEAMLESS CONNECTIVITY: CONNECT VIA BLUETOOTH OR USB TO ANY DEVICE EASILY.
- LIGHTNING-FAST SPEEDS: PRINT UP TO 72 LABELS PER MINUTE TO BOOST PRODUCTIVITY.
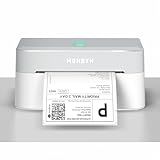
MUNBYN Bluetooth Thermal Label Printer RW403B, Wireless 4x6 Shipping Label Printer for Small Business, Compatible with Android, iPhone, Windows, Mac, Chromebook, Print Width 1.57"-4.25"
- SEAMLESS SETUP: NO DOWNLOADS NEEDED, PLUS 24 MONTHS OF EXPERT SUPPORT.
- COST-EFFECTIVE: LASTS 970,000 LABELS, CUTTING WASTE AND MAXIMIZING SAVINGS.
- PRECISION PRINTING: DAC TECH ENSURES 99.8% ALIGNMENT ACCURACY EVERY TIME.
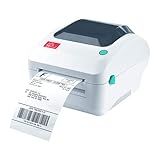
Arkscan 2054A Shipping Label Printer for Windows Mac Chromebook Android, Supports Amazon Ebay Paypal Etsy Shopify ShipStation Stamps UPS USPS FedEx DHL, Roll & Fanfold 4x6 Direct Thermal Label
- VERSATILE LABELING: PRINT FOR AMAZON, EBAY, SHOPIFY & MORE SEAMLESSLY.
- FAST & EFFICIENT: 5 INCHES/SECOND SPEED; SUPPORTS VARIOUS LABEL SIZES.
- EXPERT SUPPORT: 5-STAR U.S. TECH SUPPORT AVAILABLE FOR QUICK ASSISTANCE.
Reseller Inventory Log Book: Fast And Easy System To Keep Track Of Your Inventory Items. Made for Online Sellers on eBay, Poshmark, Mercari, Marketplace and More!
Shopify is a popular platform for e-commerce projects that allows users to easily set up and manage online stores. To use Shopify for e-commerce projects, start by signing up for an account and choosing a plan that suits your needs. Next, customize your store by selecting a template, adding products, and setting up payment and shipping options.
You can also use Shopify's built-in marketing tools to promote your store and attract customers. Additionally, Shopify offers a range of apps and integrations that can help enhance your store's functionality and improve the customer experience. Finally, monitor your store's performance and make adjustments as needed to ensure continued success. Shopify provides a user-friendly interface and comprehensive support resources to help you navigate the platform and make the most of its features for your e-commerce projects.
What is the best way to handle returns and refunds on Shopify?
The best way to handle returns and refunds on Shopify is to have a clear and transparent refund policy in place that is easily accessible to customers. Here are some tips on how to handle returns and refunds effectively:
- Develop a clear and fair return policy: Clearly outline your return and refund policy on your website so customers know what to expect when making a purchase. Include information on how long customers have to return an item, what condition the item must be in, and how refunds are processed.
- Make the return process easy: Provide customers with a simple and straightforward process for returning items, such as a return form or a designated email address for returns. Consider offering prepaid return labels to make the process more convenient for customers.
- Offer multiple refund options: Give customers the option to receive a refund in the form of store credit, exchange, or original payment method. This allows customers flexibility in how they receive their refund.
- Communicate with customers: Keep customers informed throughout the return and refund process. Send confirmation emails when a return is received, processed, and when a refund is issued. Providing updates on the status of their return can help build trust with customers.
- Monitor and analyze returns: Keep track of return and refund data to identify any trends or patterns that may indicate issues with product quality, sizing, or other factors. Use this information to make improvements to your products and services.
By following these tips, you can create a positive and hassle-free experience for customers when it comes to returns and refunds on your Shopify store.
How to set up a blog on Shopify?
To set up a blog on Shopify, follow these steps:
- Log in to your Shopify admin panel.
- Click on the Online Store section in the left-hand menu.
- Click on the Blog Posts option.
- Click on the Create Blog Post button to start creating a new blog post.
- Enter a title for your blog post and write the content in the text editor.
- You can add images, videos, and links to your blog post to make it more engaging.
- In the Visibility section, you can choose to publish the blog post immediately or schedule it for later.
- Once you are done, click on the Save button to publish your blog post.
- To create a new blog section, click on the Online Store section in the left-hand menu and then click on the Blog Posts option.
- Click on the Manage blogs button and then click on the Create blog button.
- Enter a title for your blog section and customize the settings as per your preferences.
- Click on the Save button to create your new blog section.
- You can add your blog posts to the newly created blog section by editing the blog post and selecting the appropriate blog section from the dropdown menu.
- You can further customize the design and layout of your blog by editing the theme settings in the Online Store section of your Shopify admin panel.
That's it! Your blog is now set up on Shopify and you can start publishing content to engage with your audience.
How to set up scheduled product launches on Shopify?
To set up scheduled product launches on Shopify, you can follow these steps:
- Create a new product listing or select an existing product that you want to schedule for a launch.
- In the product editor, scroll down to the "Availability" section and click on the "Manage" button next to "Sales channels".
- In the "Sales channels" popup window, select the option for "Set a specific date and time" under the "Available from" section.
- Choose the date and time you want the product to be available for purchase and click on the "Set availability" button.
- Save your changes and publish the product.
- You can also use the "Product availability" feature in the Shopify admin to set up multiple availability dates/times for a product, such as for limited-time promotions or flash sales.
By following these steps, you can easily schedule product launches on Shopify and control when your products will be available for purchase on your online store.
How to customize your Shopify store's theme?
To customize your Shopify store's theme, follow these steps:
- Log in to your Shopify account and go to the "Online Store" section of your admin dashboard.
- Click on "Themes" and then select the theme you want to customize.
- Click on the "Customize" button to open the theme editor.
- In the theme editor, you can make changes to various elements of your store, including the header, footer, colors, fonts, and layout. You can also add or remove sections and blocks to customize the design of your store.
- To make changes to specific elements, click on the section you want to customize and use the options in the editor to make your desired changes.
- You can also add custom CSS code to further customize your theme's design. To do this, click on the "Actions" drop-down menu in the theme editor and select "Edit code." From there, you can access the theme's HTML, CSS, and JavaScript files to make more advanced customizations.
- Once you are satisfied with your changes, click on the "Save" button to apply them to your store.
- Don't forget to preview your changes before publishing them to ensure they look the way you want them to.
By following these steps, you can customize your Shopify store's theme to create a unique and visually appealing online store that reflects your brand.
How to use Shopify's mobile app for managing your store on the go?
To use Shopify's mobile app for managing your store on the go, follow these steps:
- Download the Shopify mobile app on your smartphone or tablet from the App Store (for iOS devices) or Google Play (for Android devices).
- Log in to your Shopify account using your store's credentials.
- Once logged in, you will see a dashboard with an overview of your store's performance, including sales, orders, and visitors.
- Use the navigation menu at the bottom of the screen to access different sections of the app, such as Orders, Products, Customers, and Analytics.
- In the Orders section, you can view and manage orders, update order statuses, and send tracking information to customers.
- In the Products section, you can add new products, update product details, and manage inventory levels.
- In the Customers section, you can view customer profiles, track customer orders, and communicate with customers via email or chat.
- In the Analytics section, you can monitor your store's performance, track sales trends, and view important metrics such as conversion rates and average order value.
- You can also use the app to create discounts, view and respond to customer inquiries, and edit your store's settings.
Overall, the Shopify mobile app is a convenient tool for managing your online store on the go, allowing you to stay connected and make updates to your store anytime, anywhere.
What is the process for integrating third-party apps with Shopify?
Integrating third-party apps with Shopify involves the following steps:
- Research and choose a compatible third-party app: Start by researching different third-party apps that offer the features and functionality you need for your Shopify store. Check if the app is compatible with Shopify and meets your specific requirements.
- Install the app: Once you have chosen a third-party app, install it on your Shopify store by accessing the Shopify App Store and following the installation instructions provided by the app developer.
- Configure the app: After installing the app, configure its settings and customize it according to your preferences. Most apps offer a user-friendly interface that allows you to easily set up and manage the app's features.
- Test the app: Before making the app live on your Shopify store, thoroughly test its functionality to ensure it works as intended and integrates seamlessly with your store's existing features and design.
- Launch the app: Once you are satisfied with the app's performance, make it live on your Shopify store and allow customers to start using its features.
- Monitor and optimize: Continuously monitor the performance of the third-party app on your Shopify store and make any necessary optimizations to improve its functionality and user experience.
By following these steps, you can successfully integrate third-party apps with Shopify and enhance your store's capabilities and customer experience.