Best MIDI Controllers to Buy in July 2026
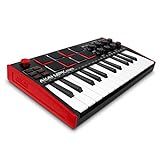
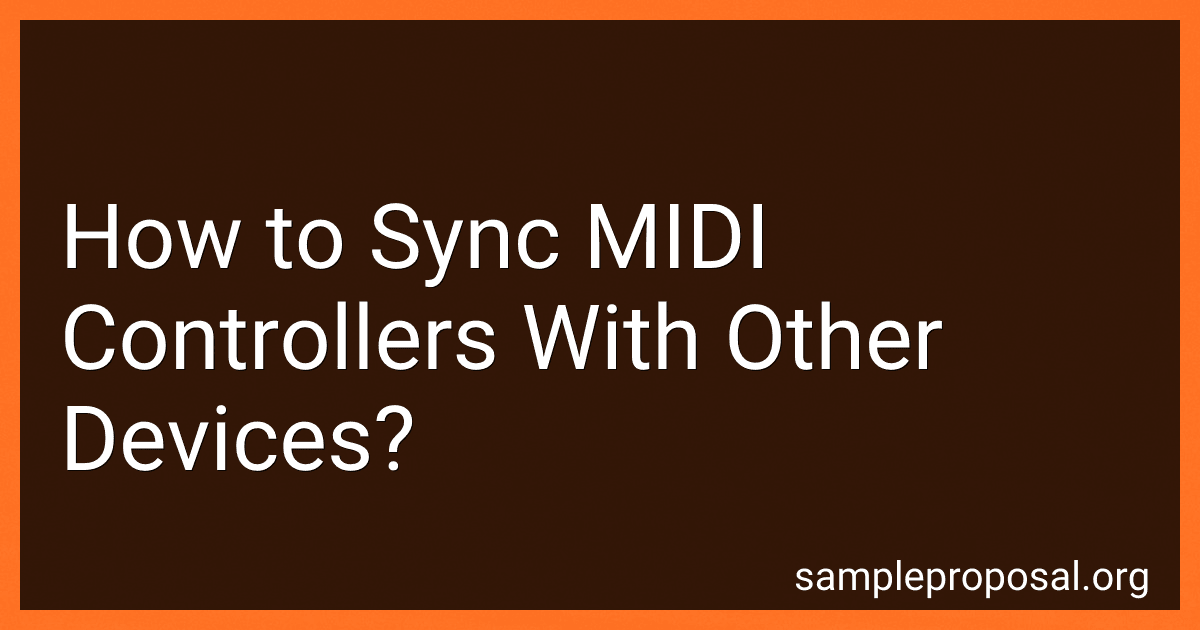
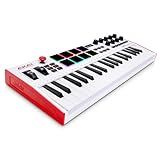
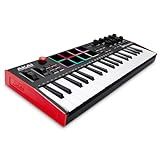
Akai Professional MPK Mini MK3-25 Key USB MIDI Keyboard Controller With 8 Backlit Drum Pads, 8 Knobs, Music Production Software and Native Instruments Sound Package (NKS Integration)
- COMPACT MIDI CONTROLLER: 25 VELOCITY-SENSITIVE KEYS FOR INTUITIVE CONTROL.
- DYNAMIC CONTROL FEATURES: 4-WAY THUMBSTICK AND BUILT-IN ARPEGGIATOR.
- EXCLUSIVE NKS BUNDLE: CHOOSE FROM 3 CURATED KOMPLETE 15 SELECT OPTIONS.


Akai Professional MPK Mini MK3-25 Key USB MIDI Keyboard Controller With 8 Backlit Drum Pads, 8 Knobs, Music Production Software and Native Instruments Sound Package (NKS Integration), Black
- CREATE, CONTROL, AND CUSTOMIZE YOUR SOUND WITH INTUITIVE MIDI FEATURES.
- ENHANCE YOUR PRODUCTION WITH 1500+ SOUNDS AND ESSENTIAL SOFTWARE TOOLS.
- UNLOCK TWO MONTHS OF SPLICE FOR ENDLESS SAMPLE CREATIVITY AND INSPIRATION.
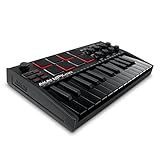
Akai Professional MPK Mini MK3-25 Key USB MIDI Keyboard Controller With 8 Backlit Drum Pads, 8 Knobs, Music Production Software and Native Instruments Sound Package (NKS Integration), White
- COMPACT MIDI CONTROLLER FOR ON-THE-GO MUSIC PRODUCTION
- DYNAMIC CONTROL WITH 4-WAY THUMBSTICK & ARPEGGIATOR
- EXCLUSIVE NKS BUNDLE FOR ENHANCED SOUND LIBRARY ACCESS
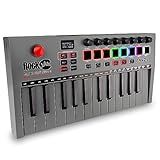
RockJam 25 Key Bluetooth Midi Keyboard
- WIRELESS FREEDOM: BLUETOOTH MIDI FOR A CLUTTER-FREE MUSIC SETUP.
- RECHARGEABLE BATTERY: PLAY MUSIC ANYWHERE-PERFECT FOR ON-THE-GO MUSICIANS!
- VERSATILE CONTROLS: 8 TOUCH PADS & KNOBS FOR COMPREHENSIVE PRODUCTION CONTROL.
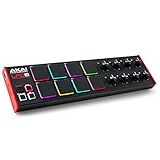
Akai Professional LPD8 - USB MIDI Controller with 8 Responsive RGB MPC Drum Pads for Mac and PC, 8 Assignable Knobs and Music Production Software
- 8 RGB-BACKLIT PADS FOR DYNAMIC TRIGGERING OF SAMPLES AND LOOPS.
- 8 ASSIGNABLE KNOBS FOR TACTILE CONTROL IN YOUR FAVORITE DAW.
- LIGHTWEIGHT AND PORTABLE FOR MUSIC PRODUCTION ANYWHERE, ANYTIME.
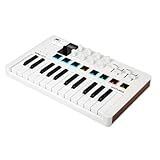
Akai Professional MPK Mini Plus - USB MIDI Keyboard Controller with 37 Mini Keys, 8 MPC Pads, Sequencer, MIDI/CV/Gate I/O and Native Instruments Sound Package, White Limited Edition
-
FULL CREATIVE CONTROL WITH A 37-KEY MPK MINI FOR RICH PERFORMANCE.
-
ADVANCED CONNECTIVITY FOR SEAMLESS INTEGRATION WITH ANY STUDIO SETUP.
-
EXCLUSIVE NKS BUNDLE OFFERS CURATED SOUNDS TO ELEVATE YOUR MUSIC.
Arturia MiniLab 3 - Universal MIDI Controller for Music Production, with All-in-One Software Package - 25 Keys, 8 Multi-Color Pads - White
- EASY, ADAPTABLE CONTROLLER ENHANCES YOUR UNIQUE MUSIC WORKFLOW.
- FLUID CONTROL WITH 8 DRUM PADS AND 4 FADERS FOR DYNAMIC PERFORMANCE.
- PREMIUM VELOCITY-SENSITIVE KEYS FOR A TRULY EXPRESSIVE MUSIC EXPERIENCE.
Donner USB-C MIDI Keyboard Controller, 25 Key Portable Mini MIDI Keyboard with 8 Drum Pads, OLED Display, 16 Smart Scales, Arpeggio, Replay, 4 DAW Software and 40 Teaching Courses, DMK 25 Pro Black
- SMART DYNAMIC SCALE MODE: PLAY BASS, MELODIES, & LEADS EFFORTLESSLY.
- REAL-TIME MULTI-MODE CONTROL: UNLEASH CREATIVITY WITH ARPEGGIO & NOTES.
- 40 KEYBOARD COURSES: LEARN MUSIC ARRANGEMENT FROM BEGINNER TO ADVANCED.
Akai Professional MPK Mini Plus - USB MIDI Keyboard Controller with 37 Mini Keys, 8 MPC Pads, Sequencer, MIDI/CV/Gate I/O, Music Production Software and Native Instruments Sound Package
-
DYNAMIC 37-KEY PERFORMANCE - UNLOCK FULL CREATIVE CONTROL WITH 3 OCTAVES.
-
ADVANCED CONNECTIVITY - EASILY CONNECT TO SYNTHS AND MODULAR GEAR.
-
COMPLIMENTARY NKS BUNDLE - CHOOSE FROM CURATED SOUND LIBRARIES FOR FREE.

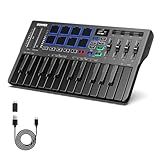
Vangoa Wireless Midi Controller Mixer Mute, Portable USB Midi Keyboard controlador Mixing Console 43 Backlit Button, 8 Channel Faders with LED indicator, 8 Assignable Endless Knobs for Daw, Mac, PC
-
43 BACKLIT BUTTONS: IGNITE CREATIVITY WITH INSTANT BEAT AND EFFECT ACCESS!
-
8 CUSTOMIZABLE FADERS: ELEVATE YOUR SOUND WITH PRECISE CONTROL AND LED FEEDBACK.
-
PORTABLE DESIGN: CREATE MUSIC ANYTIME, ANYWHERE-NO BULKY GEAR NEEDED!
To sync MIDI controllers with other devices, you will first need to determine the specific connections available on both devices. Typically, MIDI controllers can be connected to other devices such as computers, synthesizers, and other MIDI-enabled equipment using either USB or MIDI cables.
If both devices have MIDI ports, you can connect them directly using MIDI cables. Make sure to connect the MIDI Out port on one device to the MIDI In port on the other device. If one of the devices does not have MIDI ports, you can use a USB-MIDI interface to bridge the connection between them.
Once the devices are physically connected, you will need to set up the MIDI settings on each device to ensure they are communicating properly. This may involve selecting the appropriate MIDI channels, assigning MIDI controllers to specific functions, and ensuring that the devices are transmitting and receiving MIDI data correctly.
Depending on the specific devices you are trying to sync, you may also need to configure additional settings such as clock synchronization or MIDI mapping to ensure that the devices are working together seamlessly.
Overall, the process of syncing MIDI controllers with other devices involves both physical connections and software configurations to ensure that the devices can communicate effectively and work together harmoniously.
How to sync MIDI controllers with sequencers?
To sync MIDI controllers with sequencers, follow these steps:
- Connect your MIDI controller to your sequencer using a MIDI cable. Make sure to plug one end of the cable into the MIDI OUT port of the controller and the other end into the MIDI IN port of the sequencer.
- Turn on your MIDI controller and sequencer and make sure they are both set to the same MIDI channel. This can typically be done in the settings or preferences menu of each device.
- Set your sequencer to receive MIDI clock signals from your controller. This will allow the sequencer to sync to the tempo of the controller. Check the manual of your sequencer for instructions on how to do this.
- Start playing your MIDI controller and the sequencer should automatically sync up with the tempo and start playing in time with your performance.
- You can also use MIDI mapping or MIDI learn features on your controller and sequencer to assign specific controls on the controller to parameters in the sequencer, such as volume, filters, and effects.
By following these steps, you should be able to sync your MIDI controller with your sequencer and have them both working together seamlessly.
How to sync MIDI controllers with virtual instruments?
To sync MIDI controllers with virtual instruments, you can follow these steps:
- Connect your MIDI controller to your computer via a USB cable or MIDI interface.
- Open your preferred digital audio workstation (DAW) or music production software.
- Load the virtual instrument plugin you want to use in your DAW.
- In the DAW, create a new MIDI track and select the input source as your MIDI controller.
- Configure the MIDI controller to send messages to the virtual instrument. This can typically be done by using the MIDI mapping or MIDI Learn functions in the software.
- Play notes or trigger sounds on your MIDI controller, and you should hear the corresponding sounds coming from the virtual instrument.
- You can further customize the MIDI controller mapping to control parameters like volume, pitch, modulation, etc., in the virtual instrument.
By following these steps, you can sync your MIDI controller with virtual instruments and start creating music with ease.
What is the difference between MIDI clock and timecode when syncing controllers?
MIDI clock and timecode are both used to sync controllers and other devices, but they work in slightly different ways.
MIDI clock is a synchronization signal that is sent over a MIDI connection to keep devices in time with each other. It consists of a series of regular messages that tell other devices what tempo to play at. MIDI clock is typically used to sync musical instruments and sequencers so that they play in time with each other.
Timecode, on the other hand, is a more precise form of synchronization that is typically used in film and video production. It is a continuous stream of data that specifies the exact time at which each frame of video or audio should be played. Timecode can be used to sync devices to specific points in a timeline, making it useful for coordinating multiple elements of a production.
In summary, MIDI clock is a musical synchronization signal used to keep devices playing in time with each other, while timecode is a precise timing signal used in film and video production to sync devices to specific points in a timeline.
How to sync MIDI controllers with external hardware synths?
To sync MIDI controllers with external hardware synths, you will need to follow these steps:
- Make sure all your devices are powered on and connected. This includes your MIDI controller, external hardware synth, and audio interface.
- Connect your MIDI controller to your computer or audio interface using a MIDI cable or USB cable. Make sure the MIDI input/output ports are correctly connected.
- Configure your DAW or MIDI software to recognize both your MIDI controller and external hardware synth. This may involve setting up MIDI inputs and outputs, as well as selecting the appropriate channels and settings for both devices.
- Set the MIDI clock on your DAW or MIDI software to sync with the external hardware synth. This will ensure that the timing of your MIDI controller is in sync with the external hardware synth.
- Check the MIDI settings on your external hardware synth to ensure that it is set to receive MIDI clock signals from your DAW or MIDI software. This will allow the synth to sync with your MIDI controller.
- Test the synchronization by playing notes on your MIDI controller and listening for the sound coming from the external hardware synth. Make sure that the timing is accurate and that both devices are working together seamlessly.
By following these steps, you should be able to sync your MIDI controller with external hardware synths effectively for a more integrated and cohesive music production experience.
What is the function of tempo maps in syncing MIDI controllers?
Tempo maps are used to define the tempo changes and timing of a piece of music. In the context of syncing MIDI controllers, tempo maps help ensure that all connected MIDI devices are playing in time with the music by providing a reference point for the tempo and timing of the performance. This helps to create a more cohesive and synchronized performance, especially when multiple MIDI devices or tracks are involved. Tempo maps can be used to automate tempo changes and adjustments during a performance, allowing for more dynamic and precise control over the timing and tempo of the music.