![How to Use MIDI Controllers With [Specific Software]? image](https://cdn.blogweb.me/1/663d0ca1a304c3e557c9abca_91c9c32d1a.png)
Best MIDI Controllers to Buy in July 2026
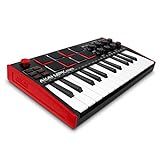
Akai Professional MPK Mini MK3-25 Key USB MIDI Keyboard Controller With 8 Backlit Drum Pads, 8 Knobs, Music Production Software and Native Instruments Sound Package (NKS Integration)
-
USB-POWERED MIDI CONTROLLER WITH 25 VELOCITY-SENSITIVE KEYS.
-
DYNAMIC PITCH/MODULATION WITH INNOVATIVE 4-WAY THUMBSTICK CONTROL.
-
INCLUDES EXCLUSIVE NKS BUNDLES WITH 1500+ PRO PRODUCTION SOUNDS.


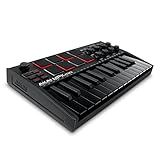
Akai Professional MPK Mini MK3-25 Key USB MIDI Keyboard Controller With 8 Backlit Drum Pads, 8 Knobs, Music Production Software and Native Instruments Sound Package (NKS Integration), Black
-
USB-POWERED MIDI CONTROLLER WITH 25 VELOCITY-SENSITIVE KEYS!
-
INNOVATIVE 4-WAY THUMBSTICK FOR DYNAMIC PITCH CONTROL!
-
EXCLUSIVE NKS BUNDLES: UNLOCK SOUNDS FOR SUPERIOR PRODUCTION!
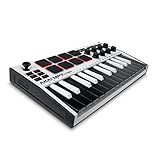
Akai Professional MPK Mini MK3-25 Key USB MIDI Keyboard Controller With 8 Backlit Drum Pads, 8 Knobs, Music Production Software and Native Instruments Sound Package (NKS Integration), White
-
COMPACT DESIGN: USB-POWERED 25 MINI KEYS FOR ON-THE-GO PRODUCTION.
-
TOTAL CONTROL: INNOVATIVE 4-WAY STICK & BUILT-IN ARPEGGIATOR.
-
EXCLUSIVE BUNDLES: GET CURATED NKS PACKS & UNLOCK 1500+ SOUNDS!
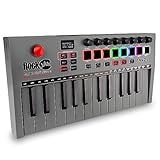
RockJam 25 Key Bluetooth Midi Keyboard
- BLUETOOTH MIDI CONNECTION: ENJOY WIRELESS FREEDOM AND A CLUTTER-FREE SETUP.
- PORTABLE DESIGN: RECHARGEABLE BATTERY LETS MUSICIANS PLAY ANYWHERE.
- DYNAMIC CONTROL: VERSATILE TOUCH PADS AND JOYSTICK ENHANCE CREATIVITY.
Akai Professional LPD8 - USB MIDI Controller with 8 Responsive RGB MPC Drum Pads for Mac and PC, 8 Assignable Knobs and Music Production Software
-
RESPONSIVE RGB PADS: TRIGGER SAMPLES AND LOOPS WITH 8 VIBRANT PADS.
-
SEAMLESS CONTROL: CUSTOMIZE WITH 8 Q-LINK KNOBS FOR PRECISE MIXING.
-
PORTABLE & STURDY: EASILY FITS IN A LAPTOP BAG FOR ON-THE-GO PRODUCTION.

Akai Professional MPK Mini Plus - USB MIDI Keyboard Controller with 37 Mini Keys, 8 MPC Pads, Sequencer, MIDI/CV/Gate I/O and Native Instruments Sound Package, White Limited Edition
-
UNLOCK CREATIVITY WITH 37-KEY MPK MINI AND BUILT-IN SEQUENCER.
-
SEAMLESS DAW CONTROL WITH NKS INTEGRATION AND INTUITIVE FEATURES.
-
GET 2 MONTHS OF SPLICE ACCESS FOR ENDLESS SAMPLE INSPIRATION.
To use MIDI controllers with [specific software], first ensure that your MIDI controller is connected to your computer through a USB port or MIDI interface. Open the software and navigate to the settings or preferences section where you can select the MIDI controller as the input device. Assign each control on the MIDI controller to a specific function within the software, such as adjusting volume, effects, or parameters. You may need to map the controls manually or use pre-configured templates provided by the software or MIDI controller manufacturer. Test the functionality of the MIDI controller with the software by moving faders, knobs, and buttons to see if they respond accordingly. Make adjustments as needed to achieve the desired control and performance.
What is the process for assigning MIDI controllers in Cubase?
To assign MIDI controllers in Cubase, follow these steps:
- Open your Cubase project.
- Click on the "Devices" menu at the top of the screen.
- Select "Device Setup" from the drop-down menu.
- In the Device Setup window, click on "MIDI Port Setup" in the left-hand column.
- Locate the MIDI controller or device you want to assign in the list of available MIDI ports.
- Check the box next to the MIDI controller/device to enable it.
- Click on "Apply" and then "OK" to save the changes.
- Close the Device Setup window.
- In the track you want to control with the MIDI controller, click on the track to select it.
- In the Inspector panel on the left-hand side of the screen, click on the "MIDI" tab.
- In the MIDI tab, click on the drop-down menu next to "Input Routing" and select the MIDI controller/device you just enabled.
- You should now be able to control the selected track with your MIDI controller.
Remember to check the user manual of your specific MIDI controller/device for any additional setup instructions or configurations that may be required.
How to connect a MIDI controller to FL Studio?
To connect a MIDI controller to FL Studio, follow these steps:
- Connect the MIDI controller to your computer using a USB cable or MIDI cables. Make sure your MIDI controller is powered on.
- Open FL Studio on your computer.
- Go to Options > MIDI Settings in the FL Studio menu.
- In the MIDI Settings window, select your MIDI controller from the Input list. You may need to click on the Refresh button to see your controller in the list.
- Check the box next to "Enable" for your MIDI controller in the Input list.
- Click on the dropdown menu next to "Output" and select the MIDI port that your MIDI controller is connected to.
- Click on "Close" to save your settings.
- Now your MIDI controller should be connected to FL Studio. You can now use your MIDI controller to play and record MIDI notes, control virtual instruments, and more in FL Studio.
If you're still having trouble connecting your MIDI controller to FL Studio, refer to the user manual for your MIDI controller or FL Studio's documentation for more specific instructions.
What is the difference between MIDI controllers and audio interfaces in Studio One?
MIDI controllers and audio interfaces serve different functions in Studio One and are used for different aspects of music production.
- MIDI controllers: MIDI controllers are used for controlling virtual instruments, software synthesizers, and other MIDI-enabled devices within Studio One. MIDI controllers typically have keys, pads, knobs, and sliders that can be mapped to different parameters in the software to manipulate sounds and perform music. They send MIDI data to the software, which can be used to trigger notes, adjust parameters, and record musical performances.
- Audio interfaces: Audio interfaces are used for recording audio signals into Studio One from external sources such as microphones, guitars, synthesizers, and other audio devices. Audio interfaces convert analog audio signals into digital data that can be recorded and processed within Studio One. They also provide high-quality audio outputs for monitoring and playback.
In summary, MIDI controllers are used for controlling virtual instruments and software parameters, while audio interfaces are used for recording and playing back audio signals in Studio One. Both are essential tools for music production, but serve different purposes in the recording and production process.
What is a MIDI controller and how does it work with Logic Pro X?
A MIDI controller is a piece of hardware that allows you to input musical notes and commands into a digital audio workstation (DAW) or music production software, such as Logic Pro X. It typically consists of keys, pads, knobs, and other controls that can send MIDI data to your software.
In Logic Pro X, you can connect your MIDI controller to your computer using a USB cable or MIDI interface. Once connected, you can map the controls on your MIDI controller to parameters within Logic Pro X, such as volume, pitch, modulation, and effects. This allows you to play and control your virtual instruments, synths, and effects plugins using your MIDI controller.
You can also use your MIDI controller to record MIDI data directly into Logic Pro X, allowing you to easily create and edit musical performances using the physical controls of your MIDI controller. MIDI controllers are a popular tool for musicians, producers, and DJs who want a more hands-on and expressive way of interacting with their music software.
How to optimize MIDI controller settings for smooth performance in Reason?
- Assign MIDI controllers to specific parameters in Reason: Go to the Preferences menu and select Control Surfaces. Click "Add" to add your MIDI controller, then assign specific controls (e.g. knobs, faders) to different parameters in Reason.
- Customize MIDI mapping: In Reason's Preferences menu, you can also customize the MIDI mapping for your controller. This allows you to assign specific functions to different knobs, sliders, and buttons on your controller.
- Adjust MIDI controller response: In Reason's Preferences menu, you can adjust the sensitivity of your MIDI controller. This can help to ensure that your controller responds smoothly and accurately to your movements.
- Use MIDI learn: Reason also features a MIDI learn function, which allows you to quickly and easily map MIDI controls to parameters in the software. This can be a more intuitive way to set up your MIDI controller for optimal performance.
- Use MIDI presets: Reason includes a variety of MIDI presets for popular controllers. These presets can save you time and effort when setting up your MIDI controller. You can select a preset and easily map controls to different parameters in Reason.
- Test your settings: After setting up your MIDI controller in Reason, take the time to test each control to ensure that everything is working smoothly. Make any necessary adjustments to optimize your performance.
By following these steps, you can optimize your MIDI controller settings in Reason for smooth performance and a more enjoyable music-making experience.