Best MIDI Controllers to Buy in July 2026
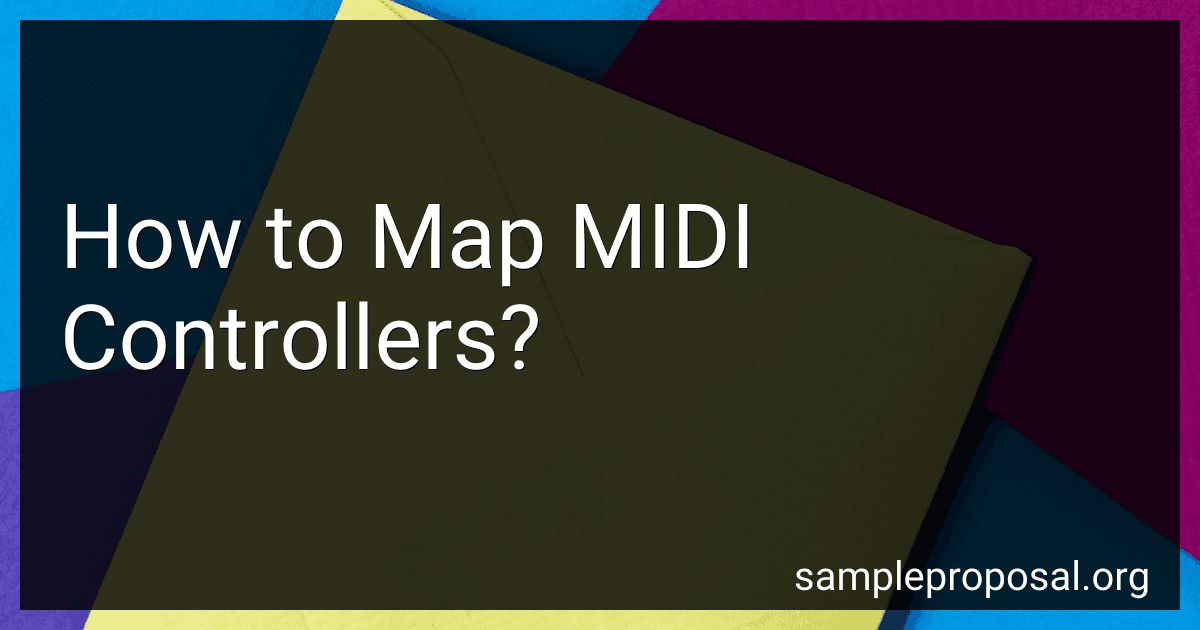
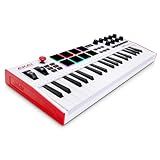
Akai Professional MPK Mini MK3-25 Key USB MIDI Keyboard Controller With 8 Backlit Drum Pads, 8 Knobs, Music Production Software and Native Instruments Sound Package (NKS Integration)
- USB-POWERED MIDI CONTROLLER WITH 25 VELOCITY-SENSITIVE KEYS.
- INNOVATIVE 4-WAY THUMBSTICK FOR PITCH, MODULATION, AND ARPEGGIATION.
- OVER 1500 SOUNDS PLUS 2 MONTHS OF SPLICE SAMPLE LIBRARY ACCESS.


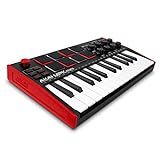
Akai Professional MPK Mini MK3-25 Key USB MIDI Keyboard Controller With 8 Backlit Drum Pads, 8 Knobs, Music Production Software and Native Instruments Sound Package (NKS Integration), Black
- COMPACT MIDI CONTROLLER: 25 VELOCITY-SENSITIVE KEYS FOR PORTABLE PRODUCTION.
- DYNAMIC CONTROL: 4-WAY THUMBSTICK AND BUILT-IN ARPEGGIATOR FOR CREATIVITY.
- EXCLUSIVE NKS BUNDLE: CURATED SOUND LIBRARIES INCLUDED FOR LIMITLESS INSPIRATION.
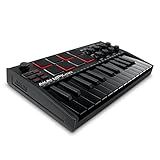
Akai Professional MPK Mini MK3-25 Key USB MIDI Keyboard Controller With 8 Backlit Drum Pads, 8 Knobs, Music Production Software and Native Instruments Sound Package (NKS Integration), White
- DYNAMIC CONTROL WITH INNOVATIVE THUMBSTICK & BUILT-IN ARPEGGIATOR.
- EXCLUSIVE NKS BUNDLES UNLOCK PREMIUM SOUNDS AND PRESETS.
- COMPLETE MUSIC PRODUCTION KIT WITH 1500+ SOUNDS FOR PRO QUALITY.
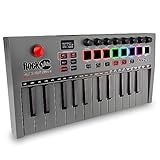
RockJam 25 Key Bluetooth Midi Keyboard
- WIRELESS BLUETOOTH MIDI: GO CABLE-FREE FOR A TIDY SETUP ANYWHERE!
- RECHARGEABLE BATTERY: PLAY MUSIC ON-THE-GO WITHOUT POWER LIMITS.
- VERSATILE CONTROLS: 8 BACKLIT PADS AND KNOBS EMPOWER YOUR MUSIC MAKING!
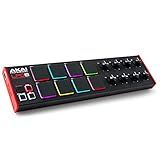
Akai Professional LPD8 - USB MIDI Controller with 8 Responsive RGB MPC Drum Pads for Mac and PC, 8 Assignable Knobs and Music Production Software
- RESPONSIVE MPC PADS: 8 RGB-BACKLIT PADS FOR DYNAMIC MUSIC CREATION.
- TACTILE CONTROL: 8 ASSIGNABLE KNOBS FOR CUSTOM DAW INTEGRATION.
- PORTABLE & DURABLE: LIGHTWEIGHT DESIGN FOR MUSIC PRODUCTION ANYWHERE.
Akai Professional MPK Mini Plus - USB MIDI Keyboard Controller with 37 Mini Keys, 8 MPC Pads, Sequencer, MIDI/CV/Gate I/O and Native Instruments Sound Package, White Limited Edition
-
DYNAMIC 37-KEY BED: EXPERIENCE FULL CREATIVE CONTROL IN THREE OCTAVES.
-
SEAMLESS CONNECTIVITY: EASILY CONNECT TO ANY GEAR WITH MIDI I/O AND CV/GATE.
-
INCLUDED NKS BUNDLE: GET EXCLUSIVE SOUND LIBRARIES TO ENHANCE YOUR MUSIC.
Mapping MIDI controllers involves assigning specific functions or parameters within a software or device to the physical controls on a MIDI controller. This process allows users to easily manipulate and control various parameters in real-time during performances or recordings.
To map a MIDI controller, users typically need to access the MIDI mapping settings within the software or device they are working with. This may involve selecting the desired parameter, such as volume, pan, or effect controls, and then assigning it to a specific control on the MIDI controller, such as a knob, slider, or button.
Once the mapping is set up, users can then physically manipulate the controls on the MIDI controller to adjust the assigned parameters in real-time. This can be particularly useful for live performances, as it allows for more dynamic and expressive control over the music being created.
Overall, mapping MIDI controllers can greatly enhance the flexibility and creativity of a musician or producer and can provide a more intuitive and interactive way to interact with their music software or devices.
How to create custom MIDI mapping templates?
To create custom MIDI mapping templates, you will need a MIDI controller that allows for custom mapping, along with a MIDI software that supports custom mapping. Here is a general guideline on how to create custom MIDI mapping templates:
- Connect your MIDI controller to your computer and launch your MIDI software.
- Open the MIDI mapping section in your software. This can usually be found in the settings or preferences menu.
- Create a new MIDI mapping template or select an existing one to modify.
- Assign MIDI commands to different functions or parameters in your software. This can include assigning knobs, faders, buttons, or pads on your MIDI controller to specific actions in the software.
- Save your custom MIDI mapping template for future use. Give it a descriptive name so you can easily access it when needed.
- Test your custom MIDI mapping template by using your MIDI controller to control the software functions you have mapped. Make any necessary adjustments to the mappings as needed.
- Once you are satisfied with your custom MIDI mapping template, save it and use it in your music production workflow.
Remember that the specific steps for creating custom MIDI mapping templates may vary depending on the MIDI controller and software you are using. Consult the user manual or online resources for your specific equipment to ensure you are following the correct steps.
How to map MIDI controllers for DJing?
To map MIDI controllers for DJing, you will need DJ software that allows for MIDI mapping, such as Serato DJ, Traktor, or Virtual DJ. Here is a general guide on how to map MIDI controllers for DJing:
- Connect your MIDI controller to your computer via USB.
- Open your DJ software and navigate to the MIDI mapping section. This can usually be found in the settings or preferences menu.
- Look for the "MIDI Learn" or "MIDI Mapping" button in your software and click on it.
- Start assigning functions to your MIDI controller by selecting a function in your software (such as play/pause, cue points, volume control, EQ, effects, etc.) and then moving the corresponding knob, fader, or button on your MIDI controller.
- Repeat step 4 for all the functions you want to map to your MIDI controller.
- Once you have finished mapping all the functions, save your MIDI mapping configuration so you can easily load it up in the future.
- Test out your MIDI controller to make sure all the mapped functions are working correctly.
It is important to note that every DJ software may have slightly different MIDI mapping procedures, so it is recommended to refer to the software's user manual or online tutorials for more specific instructions on MIDI mapping for that particular software.
How to map MIDI controllers in Ableton Live?
To map MIDI controllers in Ableton Live, follow these steps:
- Connect your MIDI controller to your computer and open Ableton Live.
- Go to the "Preferences" menu by clicking on "Live" in the top menu and selecting "Preferences" or by pressing "Ctrl + ,".
- In the Preferences window, click on the "MIDI" tab.
- Make sure that your MIDI controller is listed under "Input" in the MIDI Ports section. If it is not listed, make sure your controller is properly connected and recognized by your computer.
- Next, click on the "Track" or "Remote" button next to your MIDI controller's name under the "Input" section. "Track" allows you to use the MIDI controller to control parameters on individual tracks, while "Remote" allows you to map the controller to any parameter in Ableton Live.
- Close the Preferences window and go to the MIDI Mapping mode by clicking on the MIDI button in the top right corner of Ableton Live (the button looks like a small keyboard).
- Click on the parameter you want to map (e.g. a knob or fader on a device) in Ableton Live.
- Move or press the corresponding control on your MIDI controller to map it to the selected parameter. You should see the parameter value change as you move the control on your MIDI controller.
- To unmap a control, right-click on the parameter and select "Unmap" or press "Backspace" on your keyboard while the parameter is selected.
- You can also map multiple parameters to different controls on your MIDI controller by repeating steps 7-9 for each parameter you want to map.
- To exit MIDI Mapping mode, click on the MIDI button in the top right corner of Ableton Live again.
That's it! You have successfully mapped your MIDI controller in Ableton Live. You can now use your controller to control various parameters in Ableton Live.
How to map MIDI controllers for live performances?
Mapping MIDI controllers for live performances can greatly enhance your ability to interact with your music in a dynamic and expressive way. Here are some steps to help you effectively map MIDI controllers for your live performances:
- Choose the right MIDI controller: Select a MIDI controller that suits your performance style and preferences. Consider factors such as the number of pads, sliders, knobs, and buttons, as well as the size and layout of the controller.
- Configure your DAW or software: Make sure your digital audio workstation (DAW) or software is capable of MIDI mapping. Familiarize yourself with the MIDI mapping features and options available in your software of choice.
- Assign MIDI controls: Decide which parameters you want to control with your MIDI controller. This could include volume, effects, filters, instruments, or anything else you want to manipulate during your performance.
- Enter MIDI mapping mode: Enter the MIDI mapping mode in your software and select the parameter you want to assign a MIDI control to.
- Assign the MIDI control: Move, press, or turn the desired control on your MIDI controller to assign it to the selected parameter in your software.
- Test and refine: Test your MIDI mappings to ensure everything is working as expected. Make adjustments as needed to refine the mapping and make it more intuitive for your performance.
- Save your mappings: Save your MIDI mappings so you can easily recall them for future performances.
- Practice: Spend time practicing with your MIDI mappings to become familiar with how to control your music effectively during live performances.
By following these steps and experimenting with different mapping configurations, you can create a custom setup that enhances your live performances and allows you to interact with your music in new and exciting ways.
What MIDI controllers are compatible with mapping software?
There are many MIDI controllers that are compatible with mapping software, including:
- Ableton Push
- Novation Launchpad
- Akai MPK Mini
- Native Instruments Maschine
- Behringer BCR2000
- Arturia BeatStep
- Korg nanoKONTROL
- M-Audio Oxygen 25
- Roland DJ-202
- Pioneer DDJ-SB3
These controllers can be easily mapped to different functions within mapping software such as Ableton Live, Traktor, Serato, and more, allowing for customized control over your software and hardware devices.